Your Cart is Empty


As building a boat is a technical exercise that requires precise knowledge and experience, we'll take you behind the scenes of a 3D TENDER XPRO build to give you a better understanding of the technique behind your ocean voyages. No more excuses for not having a competition boat!
This article is not a tutorial on how to assemble a boat, an activity reserved for professionals.
Cable routing
Some of you may be bothered by the cables that may be lying around on the deck of your XPRO. To solve this problem, here are a few steps to optimize the placement of your power cables. Many people don't know it, but there are already two passages in the hull's counter-mold for cables to pass through.
1 - To run cables between your console, bolster seat and transom, holes are drilled in front of the seat, console and transom, on the side of the hull. For practical reasons, the holes are drilled on the starboard side of your boat.
2 - To make cable routing easier, we use a messenger wire as a guide.
3 - The cables can now be routed through the holes, before being connected to their respective equipment.
4 - To protect the cables, sheaths are cut and the cables are passed through them. Connections can then be made between the various pieces of equipment.
Console and bolster seat mounting
To attach the console and bolster seat to the boat's hull, we position the two components in their respective pre-marked positions. We then drill several holes in the hull, using the position of the console and seat as a guide. These holes will be used to permanently fix our two components later on. The seat and console are then lifted up, and a special product called mastic-glue is applied to the fixing point, enabling the two elements to be glued to the hull.
Once installed, screws are placed in the previously drilled locations. Fixing is now complete.
Advices
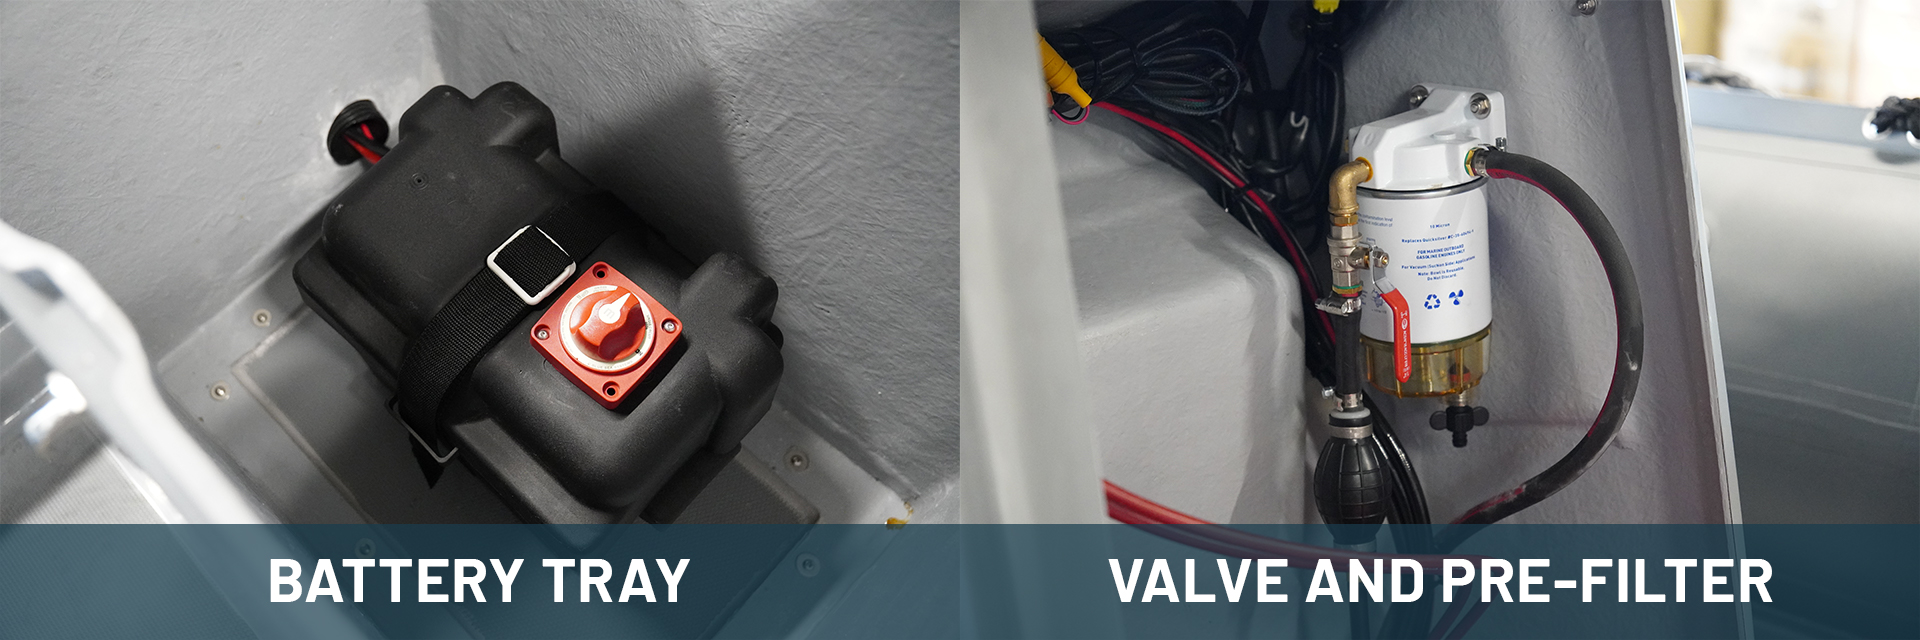
To avoid any risk, we recommend separating the battery and the fuel tank compartments, placing the battery in the bolster and the fuel tank in the console. Inside your bolster, the battery tray is attached directly to the boat's hull, by fixings underneath the tray. You can also ask for a pre-filter and a valve to be fitted to your fuel tank compartment, to cut off the flow of fuel and prevent accidents in the event of a technical incident. This is a safety feature we systematically install during our assembly work.
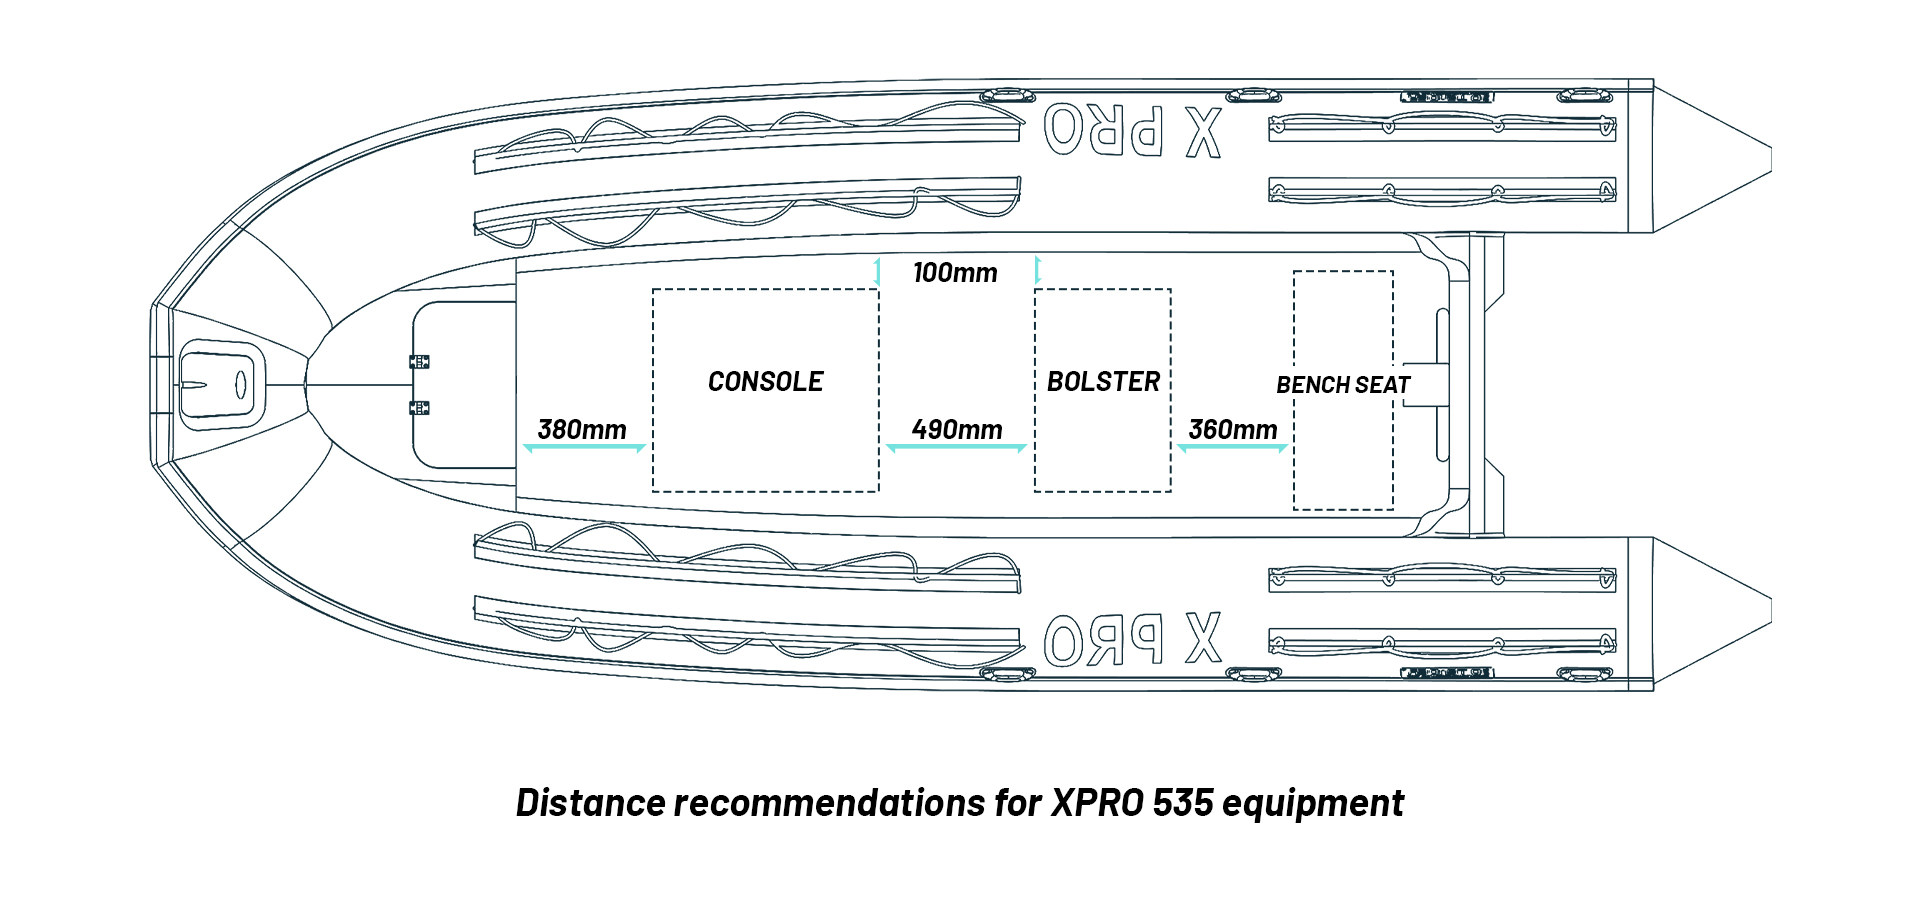
Your XPRO can be installed à la carte, i.e. you can let us know your preferences for the distance between your equipment, but here's a recommended positioning that you can take as a reference.
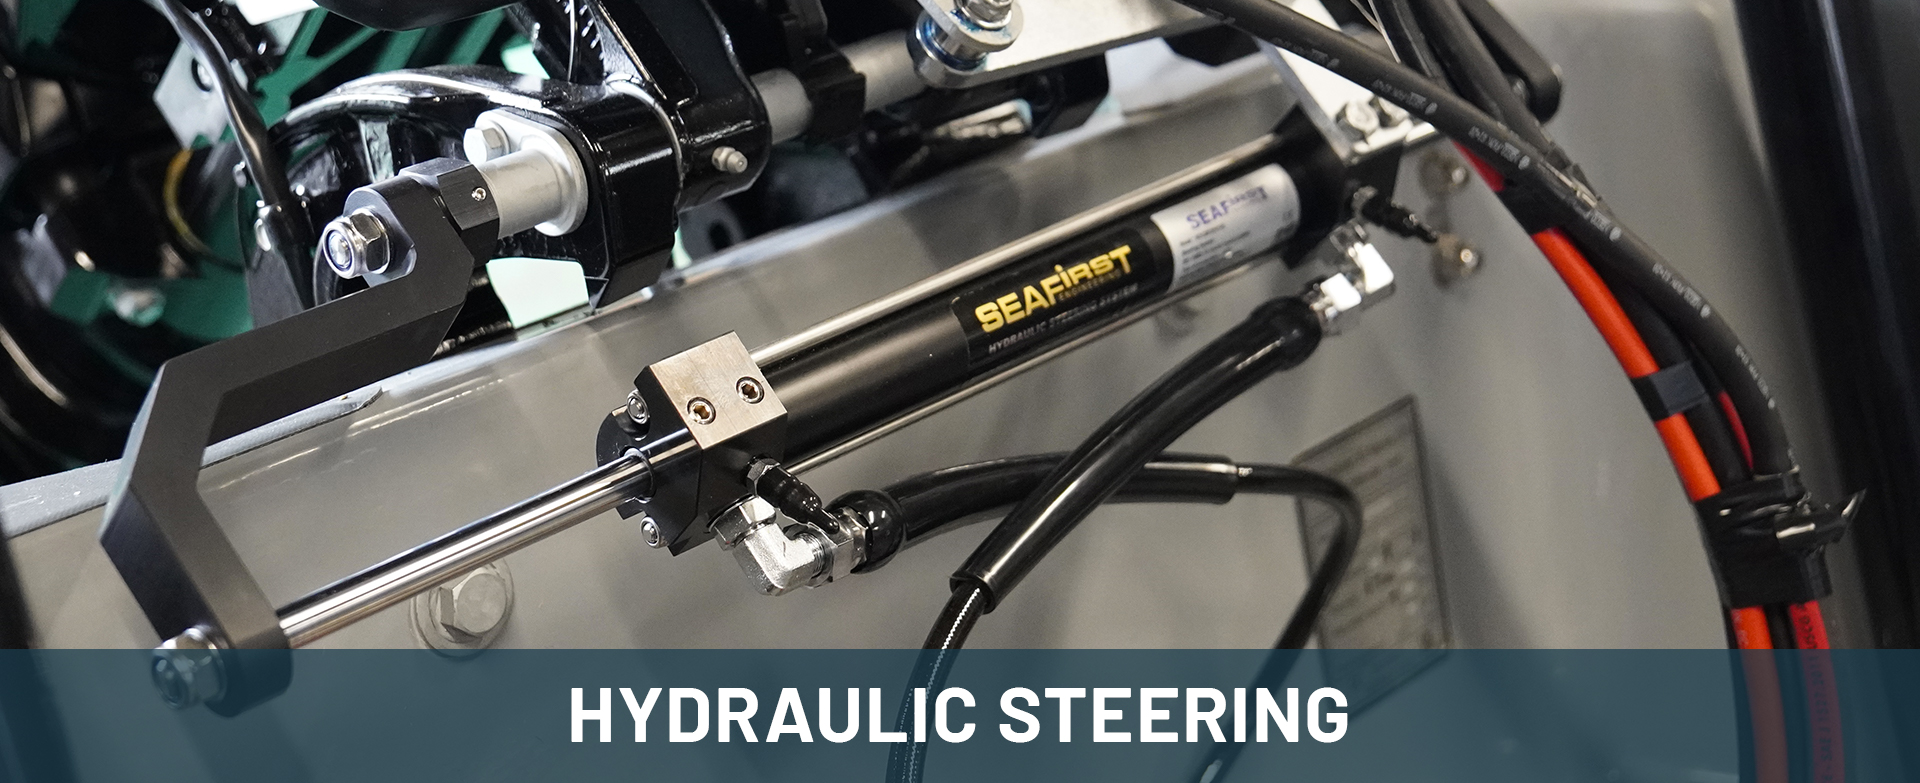
For engines of 50 HP or more, we recommend hydraulic rather than mechanical steering. This will ensure easier, more pleasant navigation. These cables are also more resistant, for longer durability.
We'll spare you the details in this article, but if you're a professional and would like to know more about how to assemble the 3D Tender XPRO, we'll direct you to one of our partners.
